


RESOURCES / BLOG / PRODUCT
How to Read Your VidSense Score: Overall Score, Sub-Scores and Bands
Contents
What the VidSense Score is
The VidSense Score sums up how ready a Reel, video or photo you upload is to publish, as a single number from 0 to 100. It sits at the top of the Content Check Result screen under "VIDSENSE SCORE", next to a decision badge: READY TO PUBLISH, PUBLISH WITH IMPROVEMENTS or EDIT FIRST.
The number alone says little. The six sub-scores underneath show which side is strong and which is weak, and the Risks tab lists the policy signals pulling the score down. This post walks through reading all three together.
The decision badge: three bands
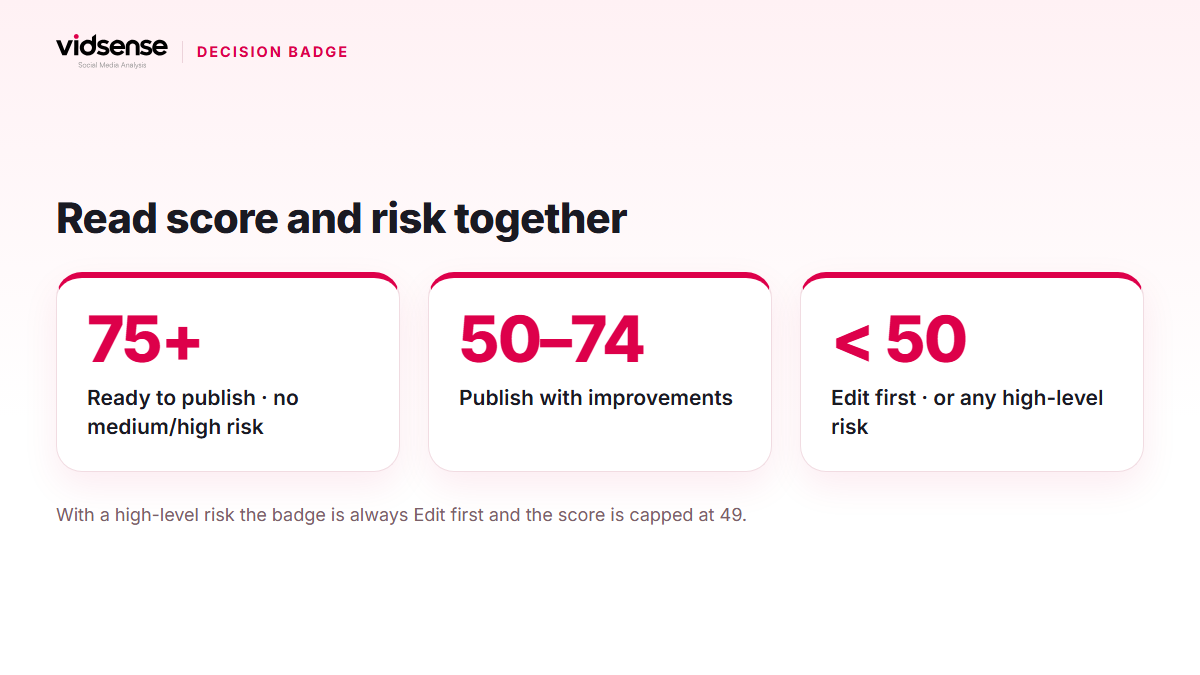
The badge is set by the score and by the level of any risks found:
- READY TO PUBLISH: score 75 or higher and no medium- or high-level risk.
- PUBLISH WITH IMPROVEMENTS: score between 50 and 74, or a higher score with a medium-level risk present.
- EDIT FIRST: score under 50, or even a single high-level risk.
That last rule matters. When a high-level risk is found (a miracle health claim next to an order prompt, for example), the badge is EDIT FIRST however good the sub-scores are, and the score is capped at 49. You never see a contradictory "70 points but edit first" result. A low-level risk does not change the badge; it simply sits on the Risks tab as something to look at.
What the six sub-scores measure
Sub-scores appear as cards on the Summary tab; bars under 70 are red, 70 and above green. Each runs from 0 to 100.
- Opening: do the first 1–3 seconds grab attention and set expectations?
- Pacing: does the edit keep momentum, or are there dead air and repeated shots? Photo checks have no pacing score.
- Audience fit: does the content suit a general Instagram audience? Today this uses general criteria.
- Clarity: is the message easy to follow, and does the main idea land early?
- On-screen text: is any text on screen readable and useful?
- CTA: is the closing call to action clear and natural, or missing entirely?
These criteria follow the signals Instagram says it ranks Reels by: how likely you are to watch a Reel all the way through, reshare it, like it and go to its audio page. Instagram also says it makes low-resolution, watermarked, muted, bordered, majority-text and previously posted Reels less visible; those conditions lower the relevant sub-score.
What a low sub-score suggests
A low sub-score is a place to look, not a verdict. A low Opening means the main idea arrives late: shorten the first sentence or move the payoff forward. A low Pacing score points you to the time-stamped cards on the Improvements tab; a card like "pacing drops between 00:14 and 00:18" tells you exactly which seconds to cut. A low On-screen text score usually means shorter text held on screen longer. A low CTA score means giving the ending one concrete next step.
The order is simple: the PRIORITY IMPROVEMENT card first, then the lowest sub-score. Changing one thing and re-checking shows you what actually worked, where changing three things at once does not.
How the score comes together
The overall score comes from the sub-scores assessed together; photos have no Pacing, so the remaining five are assessed. Then the highest risk level found comes into play: a low-level risk leaves the score as it is, a medium-level risk pulls it down, and a high-level risk keeps it in the EDIT FIRST band.
That is why two videos with identical sub-scores can end up with different results. A video whose caption carries a medium-level claim comes back with PUBLISH WITH IMPROVEMENTS; the same video with a high-level claim gets EDIT FIRST and a score that stays at 49. The sub-scores never changed, yet the outcome did: that is why the risk list belongs in your reading of the score.
The order to read a result in
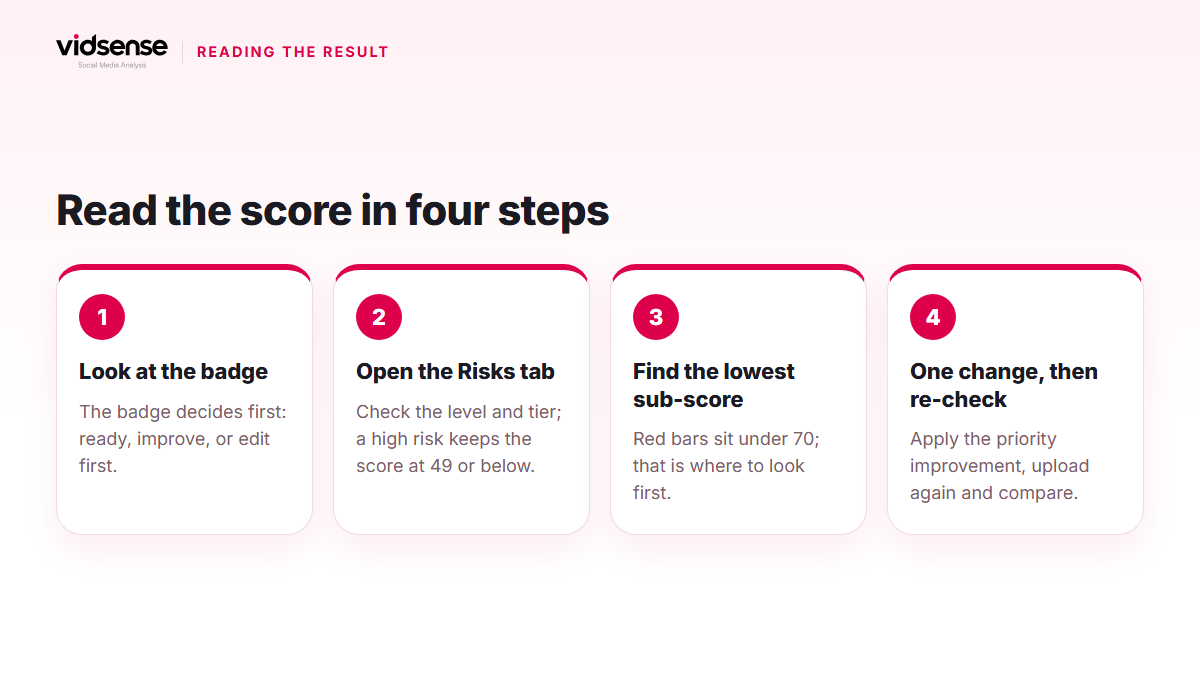
Look at the badge first; it makes the call. Then open the Risks tab and check each risk's level and tier label; if there is a high-level risk, fix that phrase before touching any sub-score. If there is no risk or only a low one, move to the lowest sub-score and start where the red bar points. Apply the priority improvement, upload the video again and compare the two results.
What the Free plan shows
On the Free plan you see the VidSense Score, the decision badge, the Opening sub-score, the priority improvement, the number of risks with the highest level found, and the first 15 seconds of the transcript. The other five sub-scores, the full improvement list, individual risk cards and the rest of the transcript open on Creator and above. Locked sections are marked clearly on screen; nothing is hidden silently.
Check it with VidSense
Before your next Reel goes out, upload it on the Content Check screen and read the score, sub-scores and risk list in one result. No account yet? Create a free one, or look at a sample result on the Post & Reels Check page first. Policy signals show possible risk; they are not an official Meta decision.
Source: Instagram's explanation of its Reels ranking signals at about.instagram.com.
Contents
Check your content before you post it.
Use Content Check to see potential risk signals before you publish.
Check your content →Keep reading
Product · 5 min read
Removal Risk, Reach Risk, Legal Risk: VidSense's Risk Tiers
Every risk card in VidSense carries a tier label: Removal risk, Reach risk or Legal risk. This post explains how the three tiers map to how Instagram actually enforces its rules, with neutral examples and the effect on your score.
October 18, 2026
Product · 4 min read
How to Run a Pre-Publish Content Check with VidSense
VidSense's Content Check reviews your text, image, or video before you publish, surfacing risk labels and safer alternatives. Here's how it works, step by step.
October 9, 2026
News · 5 min read
Announcement: The Redesigned VidSense Panel and First-Login Flow
VidSense's panel went live with its new design on 30 September 2026: a new sidebar and top bar, a first-login flow, Content Check and result screens, and Settings. Here is what works today and what comes later.
October 19, 2026